Table of Contents
The Divi Email Optin module helps you collect subscriptions for your newsletters. But setting up the module to work with a third-party provider can be tricky, even for advanced users.
In this article I will give you some tips to help you solve common problems with the Email Optin module. I will also suggest some replacement plugins and embed codes that have been tested for compatibility with Divi.
Continue reading, or skip to the recommendations for your email marketing provider:
Divi Full Page Scrolling Framework Child Theme
Is your Divi email optin not working? Here are some solutions you can try…
1. Optin form is not displaying
If you cannot see the signup form, make sure that you have added a service provider in the module’s Email Account setting.
Once you have entered a name and API key, you also have to select a mailing list. If you have not created a list with your provider, you need to do this first.
If only some of your lists are showing in the Email Account setting, use the Fetch Lists button to refresh the list.
2. Configuration Error
If your Email Optin module is showing a configuration error, it is difficult to know what exactly is causing the problem.
Test the following:
- Make sure that your account name and API-keys are correct.
- Account names and/or API-keys needs to be supplied for each form.
- The fields in the module must match the fields at the service provider.
- When creating custom fields, make sure that names and ID’s match.
- If a field is required, it needs to be marked as required both in the module and at the service provider.
3. The form is not submitting
If cache is enabled on pages where you are using the Email Optin module, the form will not work. You either need to disable cache for that page manually, or use a cache plugin that is known to work with Divi forms.
Reading tips
If you want more troubleshooting tips, you may be interested in the following links:
Mailchimp troubleshooting
Adding custom fields
Replacement options for Divi Email Optin module
1. Mailchimp for Divi
Mailchimp is one of the most popular providers for newsletters. There are several options available that are easier to set up than the Divi Email Optin module.
Embed code
If you have created a signup form in your Mailchimp dashboard, you can use their custom embed code with Divi.
The benefits are that you don’t need to install a separate plugin, and you don’t need to find and include your API-key. This setup is easy and hassle free.
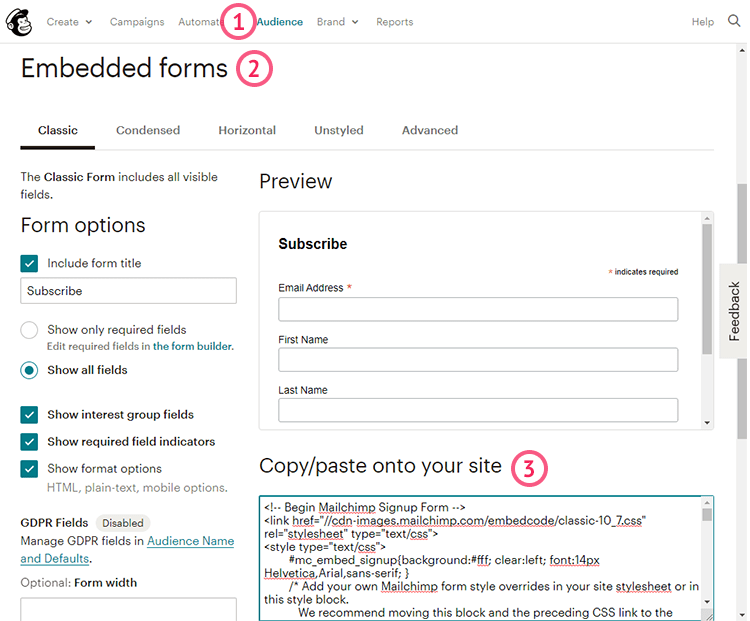
In your dashboard, select Audience (1), open Signup forms, and click on Embedded forms (2).
On this page you will find your settings and a text area with the headline Copy/paste onto your site (3). Copy the code.
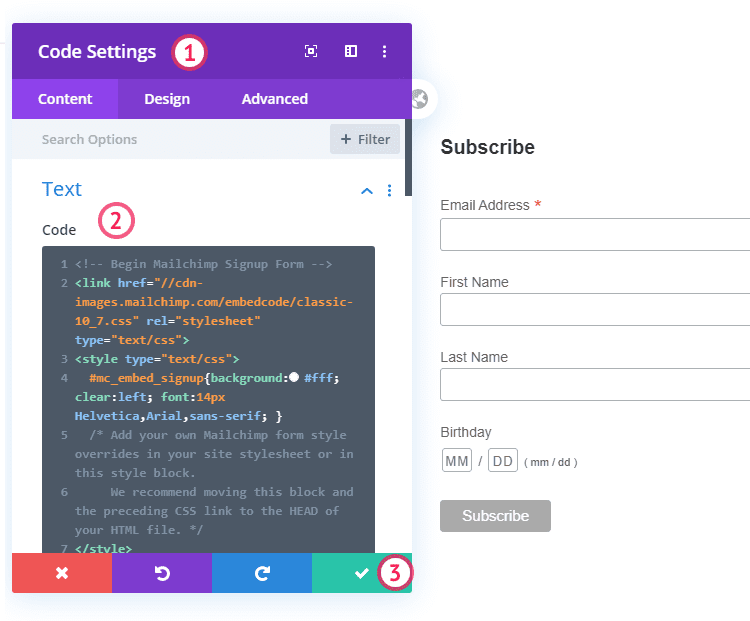
In the Divi builder, add a Code module to your section (1).
Paste the code into the Text option (2), and save (3).
You should now see a preview of your Mailchimp form:
Mailchimp plugin alternatives
MC4WP: Mailchimp for WordPress – This free plugin is the most popular Mailchimp plugin in the WordPress.org plugin directory.
One benefit with this plugin is that you only need to add your API key once and it will be used for all your forms. But the big time saver is that your form fields are copied from Mailchimp.
The plugin shows a preview of your form on the settings page where you can and add, remove and re-order form fields. You can also edit the messages that are shown to your visitors.
When you have created your optin form, copy the shortcode and paste it into a Code/Text module:
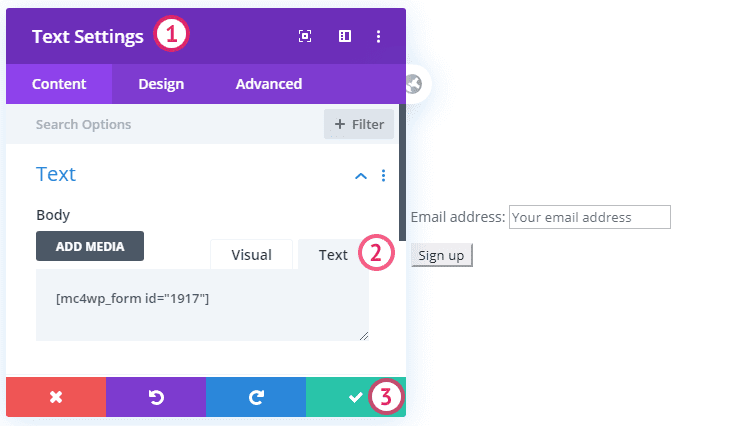
The downside to using this method is the basic default styling of the form.
You can use the design tab or CSS to improve the look.
MC4WP is a basic solution if you only need one form. If you need more forms, you have to purchase an add-on.
Easy Forms for Mailchimp – This plugin by YIKES, Inc is more advanced than MC4WP. The helpful documentation for the options makes it easy to use.
The plugin imports your form fields from Mailchimp and you can customise the messages that are shown to the visitor.
You can choose single or double optin, update existing subscribers, or redirect the visitor on submission.
Easy Forms for Mailchimp helps you solve problems with cache and nonces. It also has an easy two step integration with reCAPTCHA to help protect you from spammers.
The ability to schedule when your form will show makes it easy to create timed campaigns.
Another useful feature is the ability to import and export your forms. This is helpful if you have more than one website or if you are moving your website.
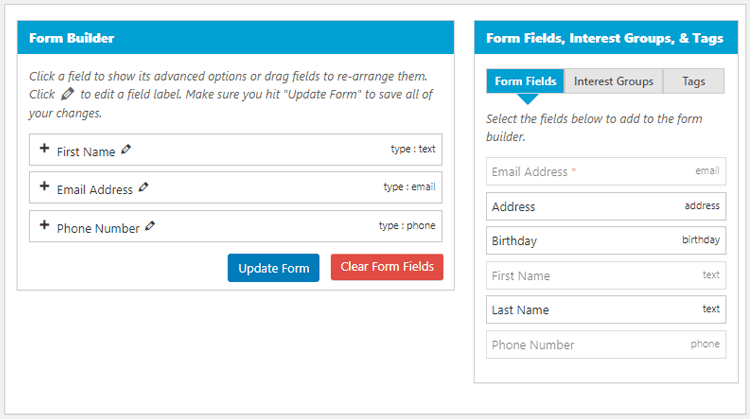
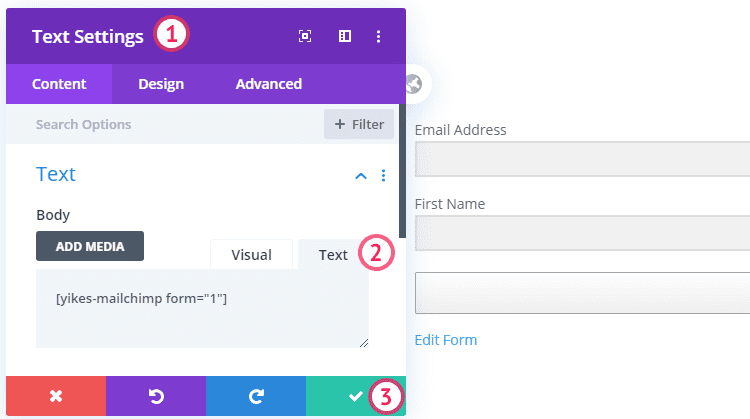
Once you have created your form, copy the shortcode from the sidebar on the settings page. Paste the code into a Code/Text module:
2. Using HubSpot subscription forms with Divi
Hubspot Plugin alternative
Hubspot has a feature rich plugin in the WordPress.org plugin directory.
First, you need to install the HubSpot All-In-One plugin and connect it to your HubSpot account.
The setup is easy and you do not need to enter an API key if you are logged in to HubSpot. Your forms are imported for you automatically.
Go to the HubSpot menu in the WordPress admin area (1) and select Forms (2). Copy the shortcode for the form that you want to use (3):

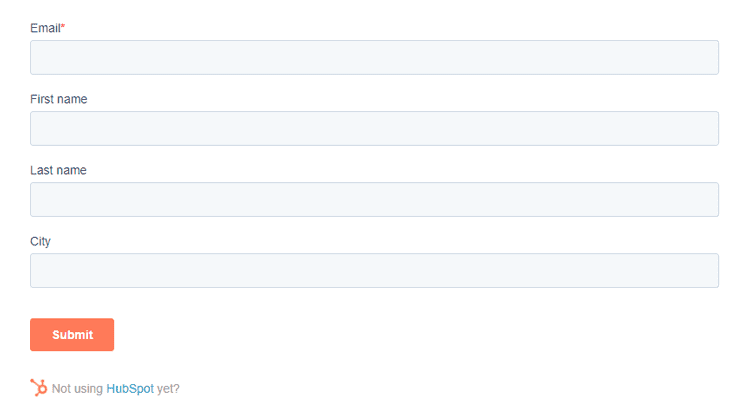
Paste the shortcode into a Divi Code/Text module and save. The form cannot be previewed in the editor but works on the front:
Embed Code
If you have created a subscription form but you don’t want to use the plugin, you can use the embed code. The code is provided to you by HubSpot after you publish your subscription form:
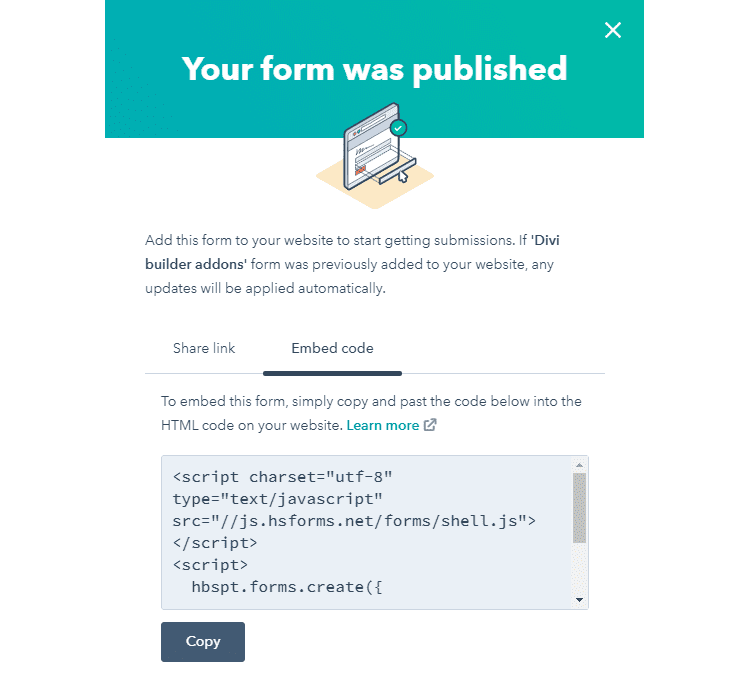
Copy and paste the code into a Divi Code module and save. The form cannot be previewed in the editor but works on the front.
3. MailPoet WordPress plugin for Divi powered websites
MailPoet is a newsletter and marketing tool specifically for WordPress.
With the free Mailpoet plugin, you can select and edit templates for your newsletter in WordPress. The service is free for up to 1000 subscribers.
When you install the plugin, a mailing list and an example subscription form is created for you.
In the WordPress admin, select the MailPoet menu, then Forms. Open the form that you would like to use.
When you have made necessary changes to your optin form, save (1) and copy the shortcode (2).
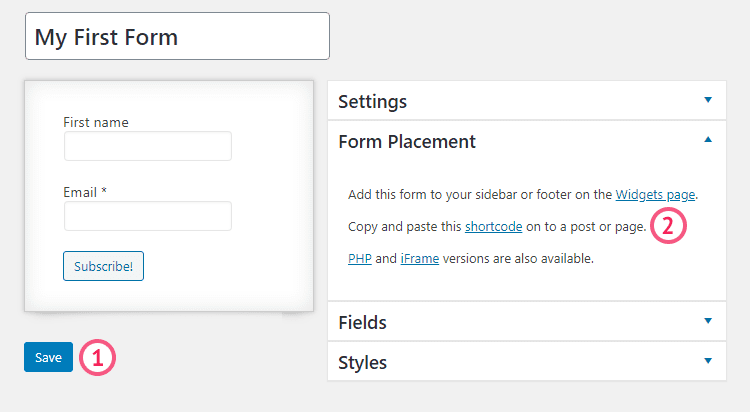
Add a new Divi Code/Text module, and paste your code:
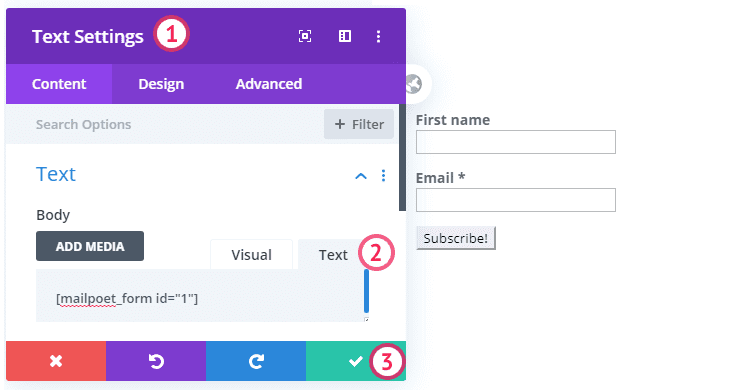
You can use the Design tab or Custom CSS to style the form.
4. Using SendinBlue plugin with Divi
SendinBlue is a service that is growing in popularity for small newsletters. The free tier allows up to 300 emails per day.
The Sendinblue Subscribe Form And WP SMTP plugin gives you access to mailing lists, campaigns and statistics in the WordPress admin. This makes it easier to maintain your newsletter and I recommend installing the plugin no matter which form you use.
There are several options when creating the newsletter optin form with the plugin. You can choose double and single optin, customize messages, confirmation emails, and redirections. The plugin also makes it easy for you to change GDPR and privacy settings.
Copy the shortcode and paste it into a Divi Code/Text module to preview the form in your content:
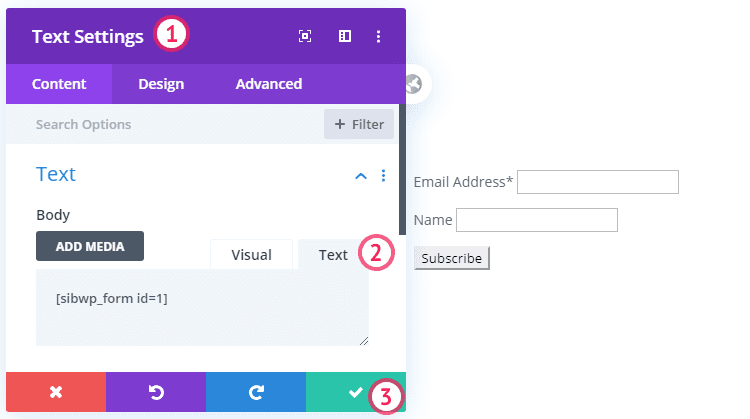
You can use the Design tab or Custom CSS to style the form. Using the plugin shortcode is a good option in case you are experiencing any authorisation issues with the Divi Email Optin module.
Conclusion
It can be difficult to set up and authorize third party services when using the Email Optin module.
The extra settings and the simple but beautiful form style makes Easy Forms for Mailchimp my favorite solution for Mailchimp.
But if you are already using HubSpot, the HubSpot All-In-One plugin has many useful features not only for signup forms.
While testing the services, I was not able to make SendinBlue or Mailpoet work with the default Email Optin module. If you have tips about using the Email Optin module, please let us know in a comment below.
As an alternative we can use embed codes or specialized plugins. When plugin shortcodes are used, some forms need additional styling. This styling can be added in the modules Advanced tab under Custom CSS.
NEXT: Check our review of 14 Best FREE Form Plugins For Divi >

Using Divi ‘Email Optin’ object, how does one populate ‘tag’ in the mailchimp schema? I already use tag in my exports and prefer not to implement groups if I can help it.
Did anyone find an answer to this?
I use visual builder when i am on design mode then the optin fields apear otherwise on mobile and desktop after publishing fields are not visible
Have you found a solution for the SendInBlue (now Brevo) integration issue –
Subscription Error: Bad Request
If we only use name and email it seems to work. The error occurs when we add the SMS and/or message fields.