Table of Contents
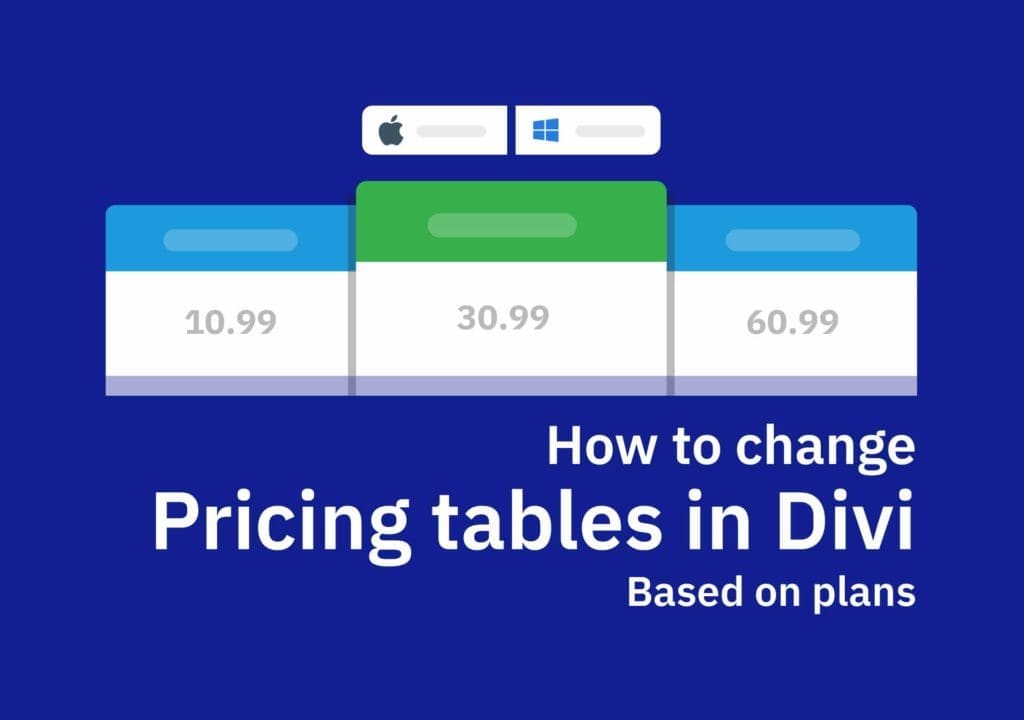
Hello Divi lovers. This is another updated version of my posts. (I am updating these as Divi has come a long way after I post this first.). Recently I got a chance to design a hosting company website. I used Divi for the site and but wanted to add some pricing tables which can be changed based on the operating systems. That means we need to change the table with a button click. There was no in-built option for that so I decided to do some custom coding there.
There were some plugins I found, but I always prefer not to use a lot of plugins on a website as it will badly affect the performance. Personal experience 🙂
So, below is what I did. Not what I did for the client but this is something similar I did to show you the functionality.

Nice trick. right? So, let me show you how I did that step by step.
Cross-Site Content Copy Paste System for Divi, Gutenberg and Woo
Step One - Add buttons section
First, add a new section. This is where we are going to have our buttons and the custom code(jQuery). We are not using the Button Modules here. Instead, add a Code Module and paste the below HTML snippet there. underneath that code module, add another Code Module. Just keep it empty for now. We will need that later for the jQuery code.
<div id="btn-group">
  <a id="windows-btn" href="#" onclick="return false">Windows</a>
  <a id="linux-btn" href="#" onclick="return false">Linux</a>
</div>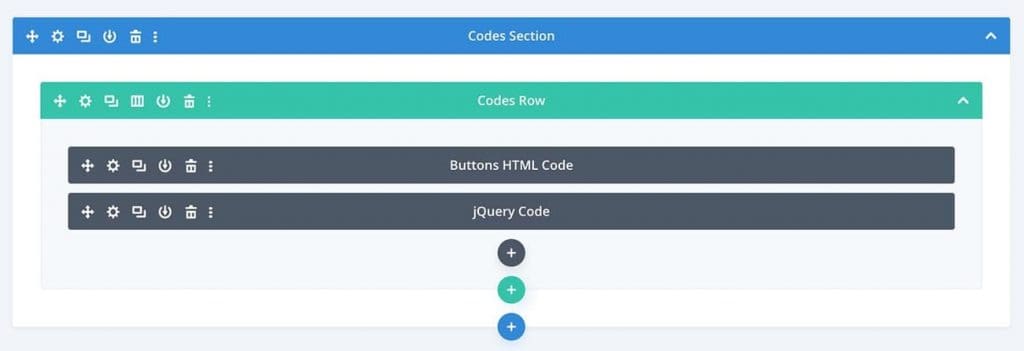
Tip: It's always a good practice to properly label(admin labels) what you add to the design. You will see how much it can help when working on larger pages.
You can style your buttons the way you want. A nice way is to add a small icon in front of the text.
Next, copy and paste the below CSS code to your website to style the buttons. You can paste in Divi Theme Option’s Custom CSS area or WP Customizer Additional CSS area or to your child theme’s style.css file. (use any method you use to add custom CSS).
You can learn more about adding custom CSS to your WordPress site in our blog.
/*__Pricing Tables__*/

#btn-group {
   text-align:center;
   margin:10px auto;
}

#btn-group a {
   padding:10px 20px;
   color:#fff;
   cursor:pointer;
   font-size:20px;
}

#windows-btn{
   background-color:#289df1;
   border-top-left-radius:6px;
   border-bottom-left-radius:6px;
}

#windows-btn:hover{
   background-color:#1e76b5;
}

#linux-btn {
   background-color:#ff2135;
   border-top-right-radius:6px;
   border-bottom-right-radius:6px;
}

#linux-btn:hover {
   background-color:#cc1d2d;
}
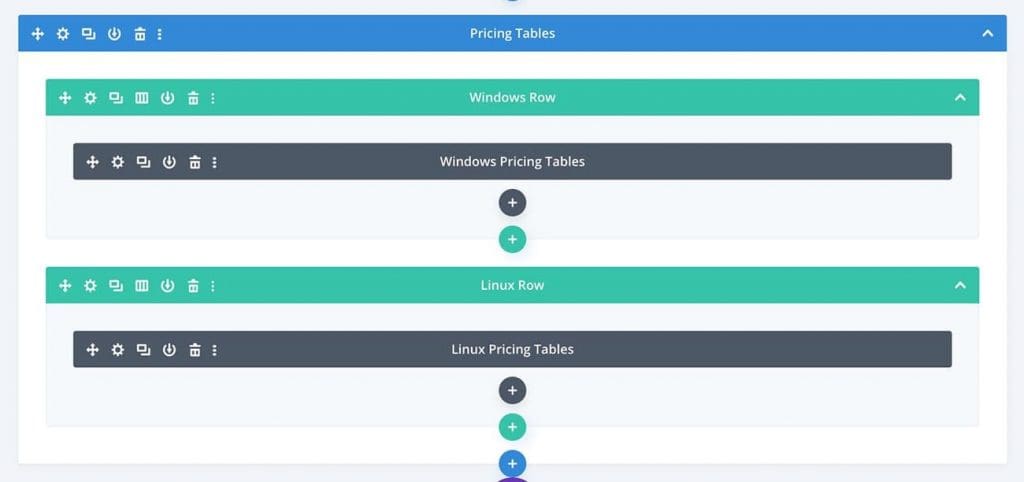
Step Two - Create the pricing tables
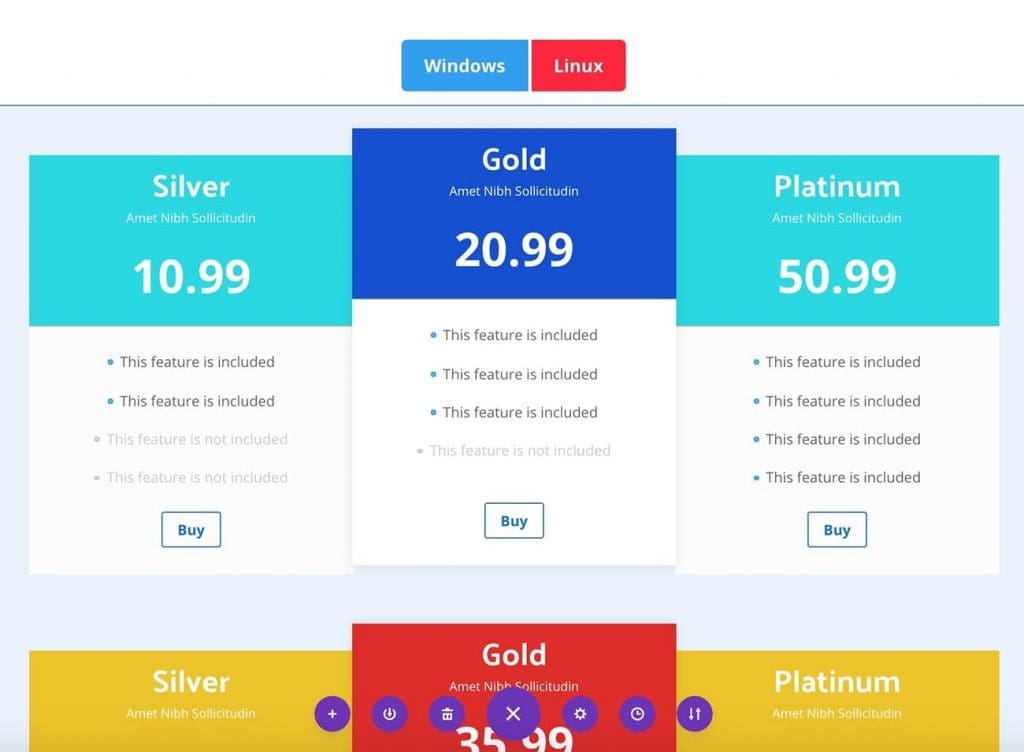
Add a new section with two Rows (One column). Here we are going to add our pricing tables. I am using the top Row to put my Windows Pricing Tables and the bottom row for Linux Pricing Tables. Style the Pricing Tables the way you want. Then add the ID‘s to each Row. I added ‘windows-table‘ to the top Row and ID ‘linux-table‘ to the bottom Row.
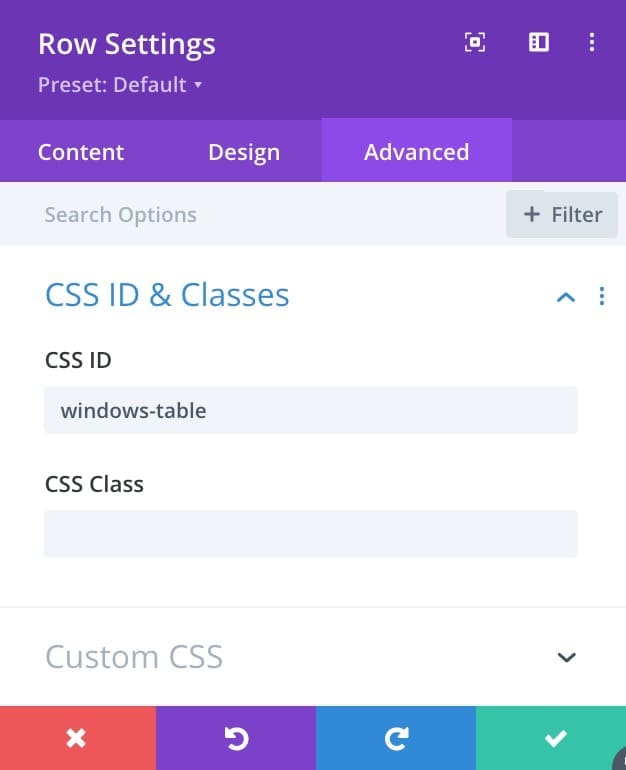
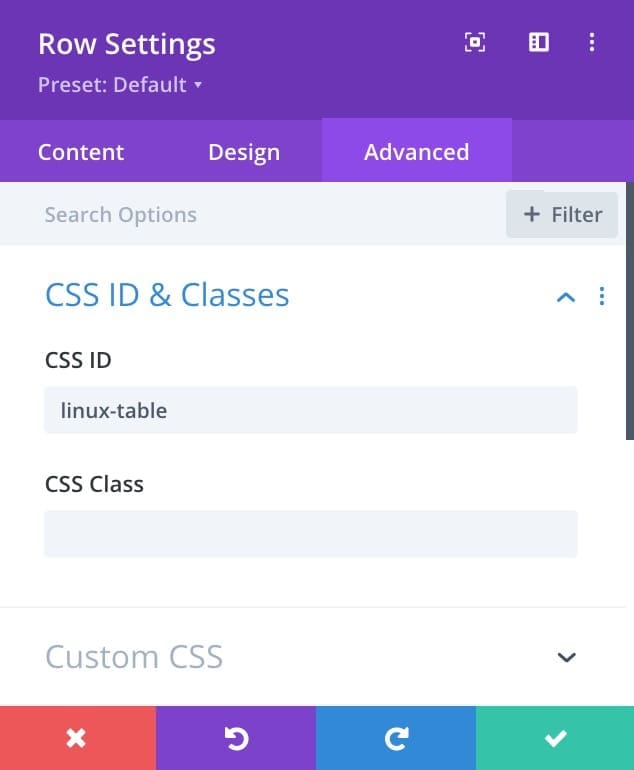
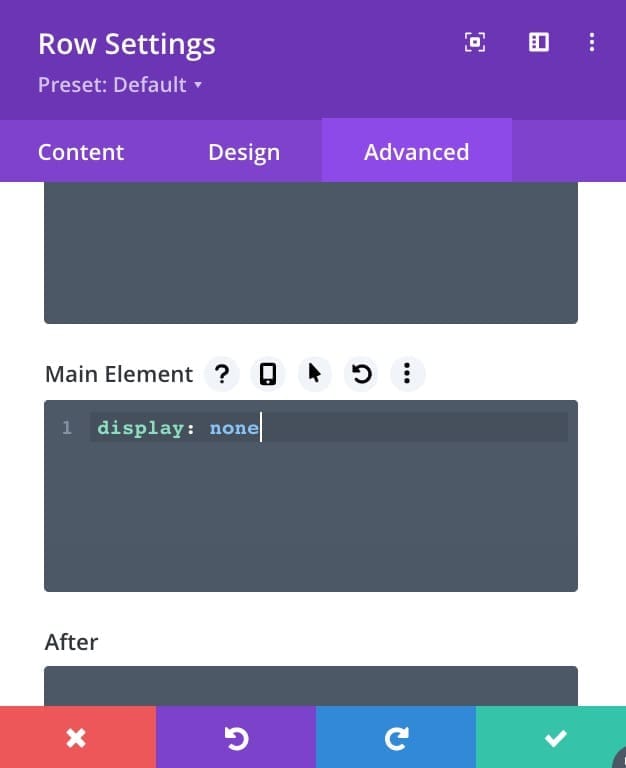
Finally, we have to hide one table. Go to the Row Settings on which you want to hide when loading. Settings > Advanced > Custom CSS. Then add display: none to the main element. See the image below.
Step Three: Change pricing tables with jQuery
Let's do the jQuery magic. Copy the below code and paste it into the code module we added when starting. Just below the buttons HTML code.
<script>
  jQuery(document).ready(function( $ ){

    $('#windows-btn').click(function(){
      $('#windows-table').show();
      $('#linux-table').hide();
    });

    $('#linux-btn').click(function(){
      $('#windows-table').hide();
      $('#linux-table').show();
    });

   });
</script>
Wonderful! isn't it?
That is how to change pricing tables in Divi based on plans. This can be used in many cases in real life. Try and let me know if you need any help. Use the comments area below and I will get in touch with you as soon as possible.