Table of Contents
Hello Divi Lovers!! I’m back with another great tutorial on how to add slide-in promo banners to your Divi-powered WordPress site. Importantly, without using any 3rd party plugins as I always love to avoid using them if possible. 🙂
You can add the banner on top or on the bottom of the page. The order of elements is not a problem at all. Just follow the steps and do the same thing as I did. Easy and simple.
Let’s start by designing our banner.
Cross-Site Content Copy Paste System for Divi, Gutenberg and Woo
Step one: Design your banner
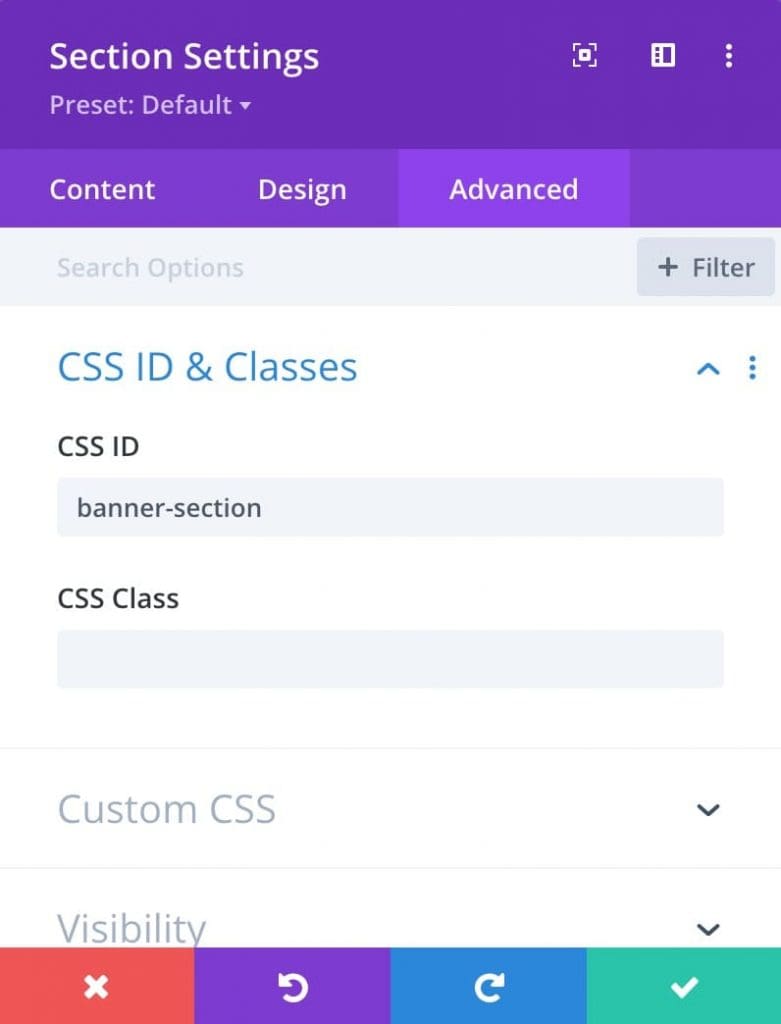
I started by adding a new section to the page. As I said before, you can add the section anywhere on the page. Most importantly give it the ID ‘banner-section‘ in Section Settings > Advanced > CSS ID & Classes.
Then design your banner with any content you want. Below is what I did on my demo.
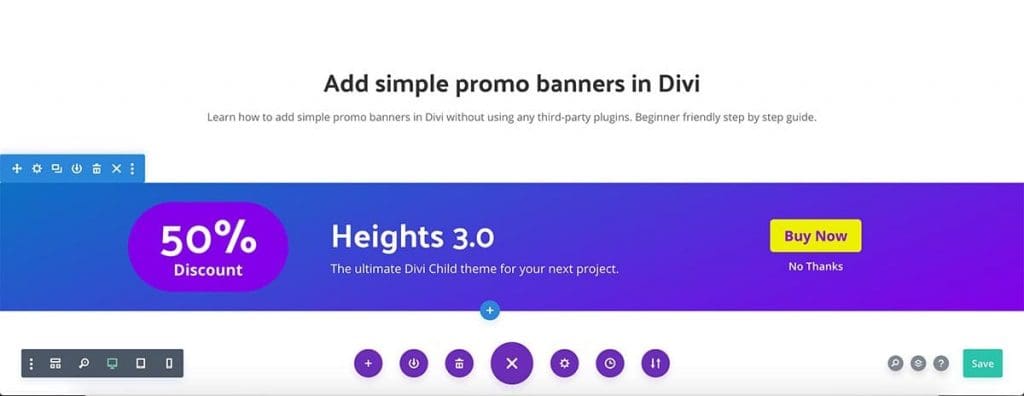
Did you notice that I have vertically aligned items here? Do you want to know how I did it? It is pretty simple, with a few things to do.
How to vertically align items in a row: First,
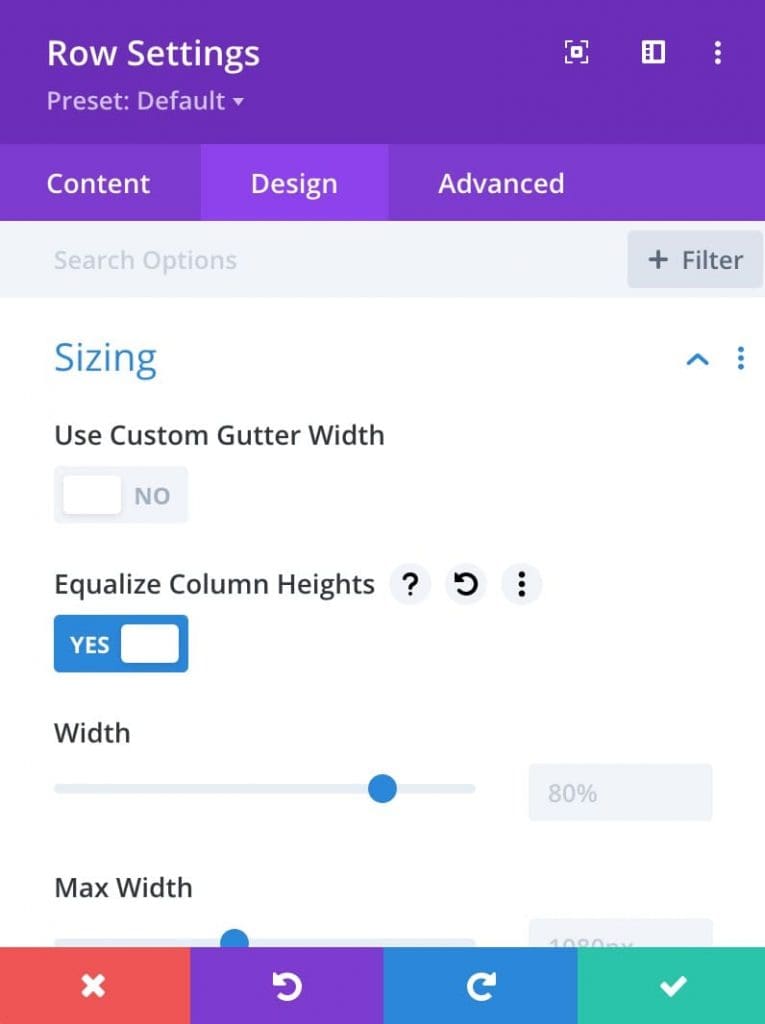
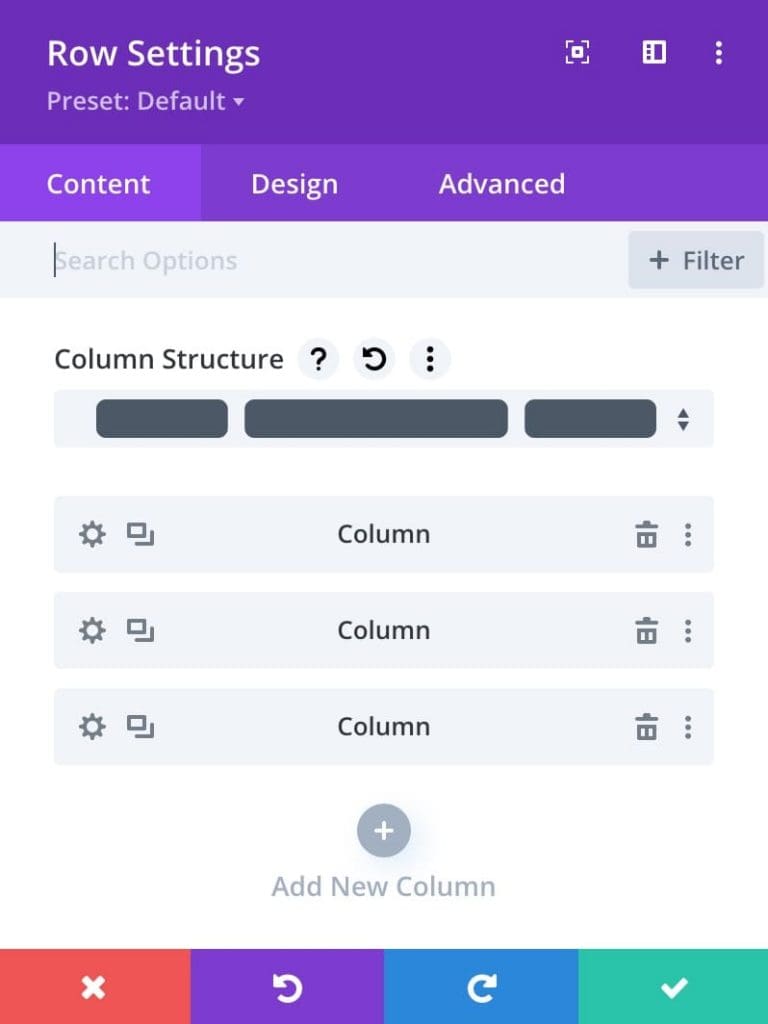
Go to the Row Settings and set ‘Equalize column heights’ to ‘YES’
Second,
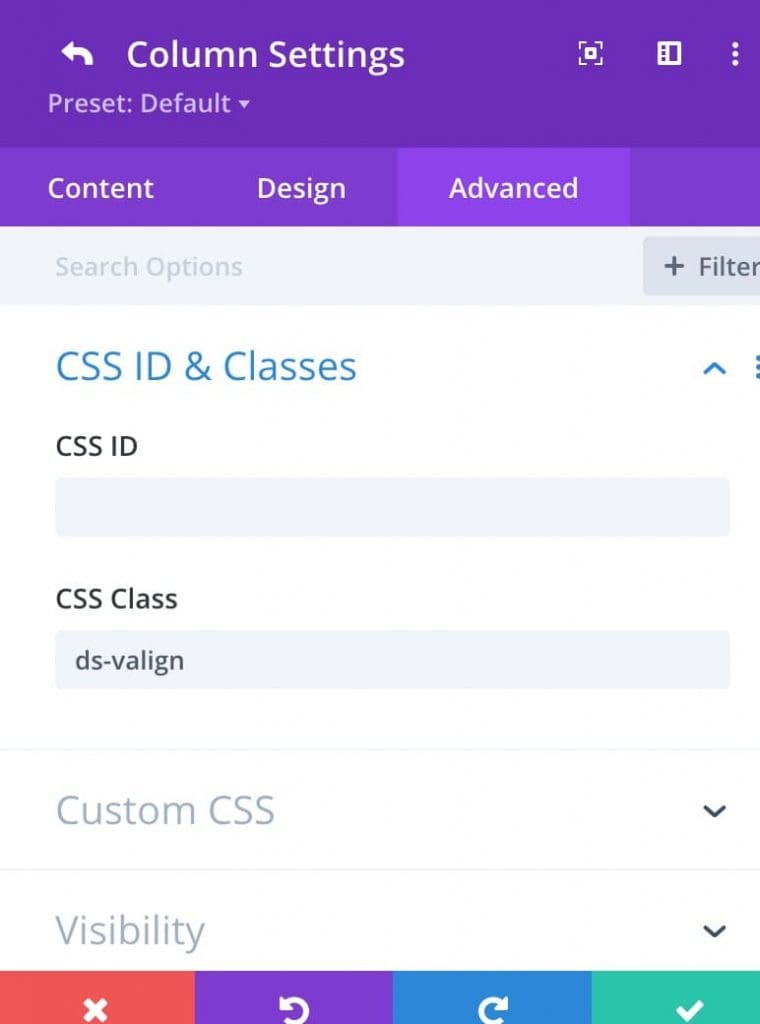
Add ‘ds-valign’ class to each column in the row.
Fianlly,
Add below CSS snippet to the site.
.ds-valign {
  display:flex;
  flex-direction: column;
  justify-content:center;
}
OK, that’s how to vertically align items in a row.
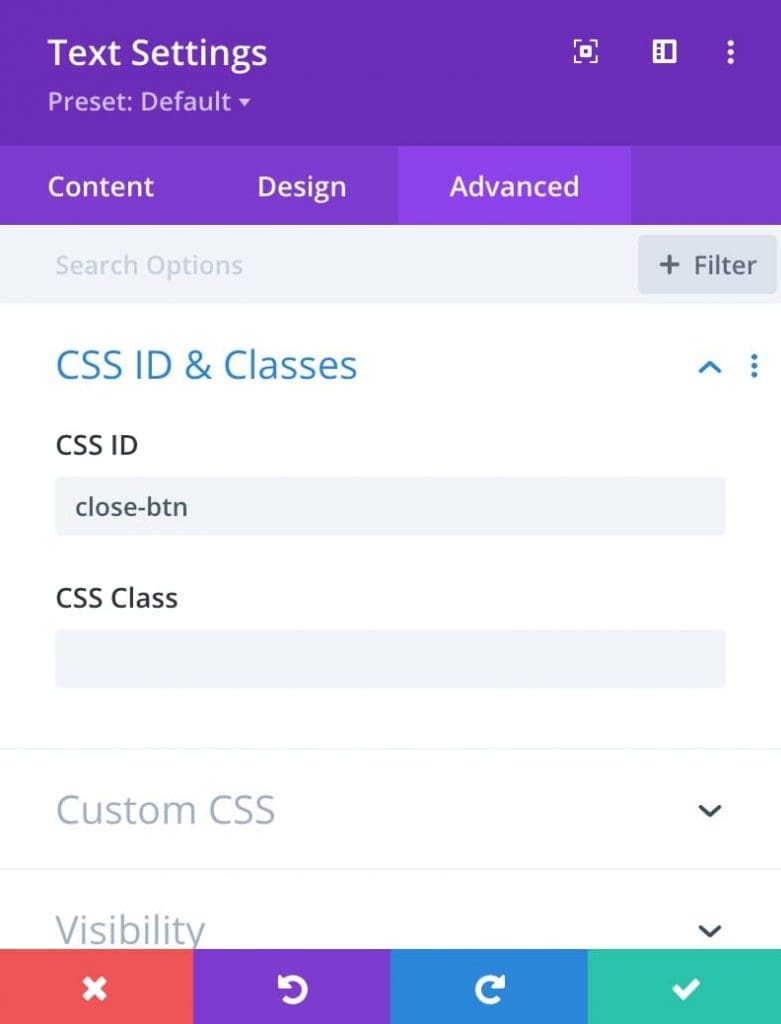
The ‘No Thanks’ word here on my banner acts as a Closing Button. So, you can add anything you wish to close the banner, a button, icon, or text. I simply used a text module here as the close button. The important thing is we have to give it the ID ‘close-btn’.
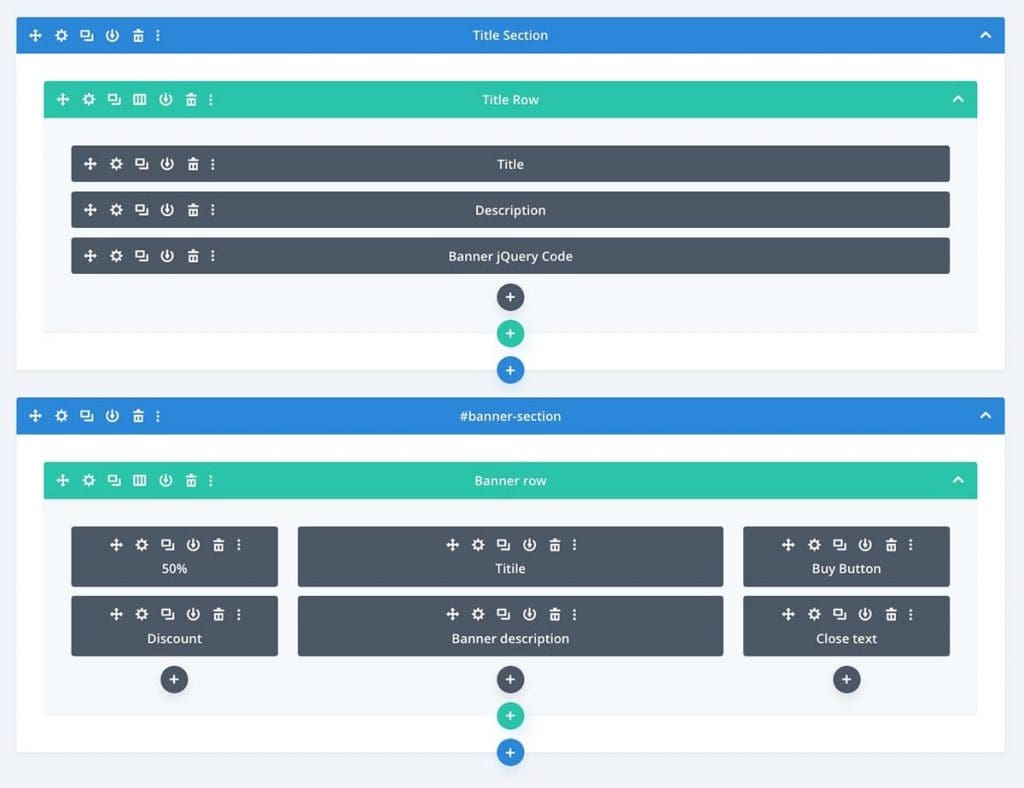
So, below is the wireframe view of my demo page. See how I have done the whole page. (We will add the Banner Jquery Code module later)
Step two: let’s add our custom CSS and jQuery
Now we are done with our design. As the final step, we have to add some CSS and jQuery to make this work. Below is the CSS code. Hope you already know how to add custom CSS or JS to WordPress/Divi sites. If not I recommend you to read This article.
#close-btn{
  cursor: pointer;
}

#banner-section {
  position:absolute;
  top:0;
  width:100%;
  display:none;
  z-index:999;
}
Let’s add the JQuery code. We have several methods but in this tutorial we are going to add the code just inside the page as we are only using the code on this specific page.
Add a Custom Code Module somewhere else on the page and paste the below jQuery code. (If you want, instead of adding a code module here, you can paste in Divi > Theme Options > Integration > Add code to the < body> Section.)
<script>
  jQuery(function($){
    $('#banner-section').delay(3000).slideDown();
    $('#banner-section').delay(7000).slideUp();

    $('#close-btn').click(function(){
      $('#banner-section').hide();
    });
});
</script>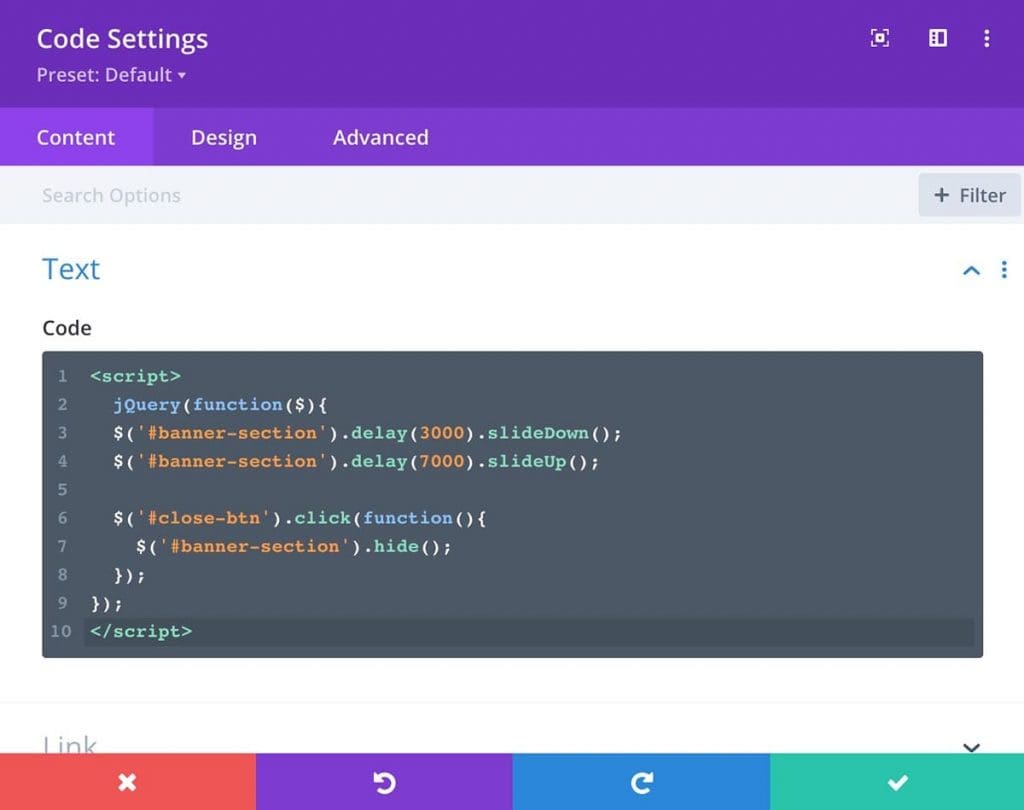
You can customize the timing to match your needs here. As you can see there are two numbers here before SlideDown and SlideUp. 1000 means 1 second. Play with the numbers here and find the perfect timing you want. SlideUp number here is for auto-hiding the banner in 7 seconds.
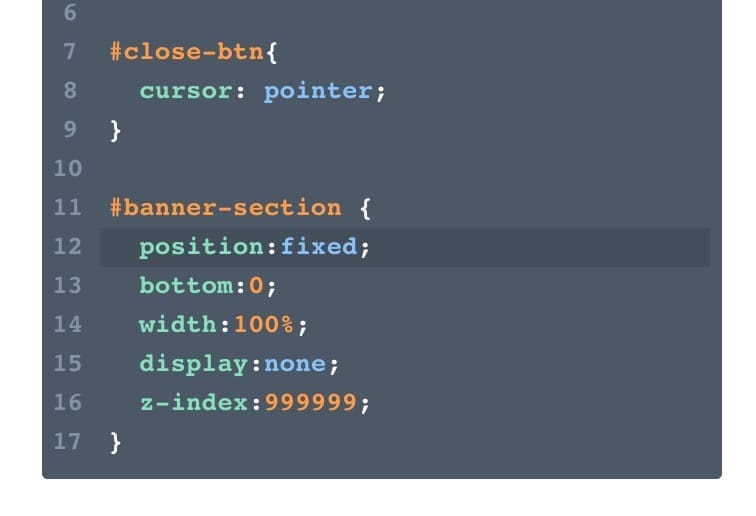
Also if you want to put this banner on the bottom of the page, you just need to do a simple fix.
Do you remember that we added ‘position: absolute;’ and ‘top:0;‘ in our CSS snippet? change those to ‘position: fixed’ and add ‘bottom: 0’. We no need top value then. After that, it will slide-in from the bottom of the page.
That’s how to add simple promo banners in Divi, guys!! Comments below if you need any help.
